Exploring the Illustrative Process of Calligraphy Dip Pen
The calligraphy dip pen is one of a kind. You can’t find a more beautiful illustrative pen than this, and in today’s article you will learn how to use a calligraphy dip pen, and its different functions to create beautiful penmanship and artwork. Today this article will show you how to use a calligraphy dip pen. Supplies wise, you can visit a variety of different stores including Michaels, Hobby Lobby, or Jo-Ann’s.
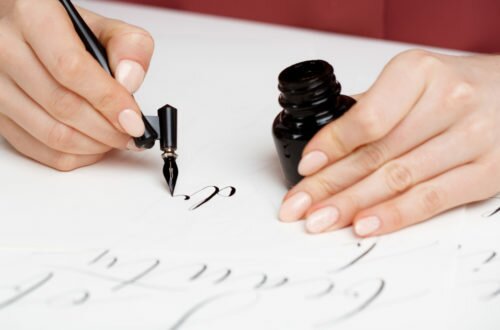
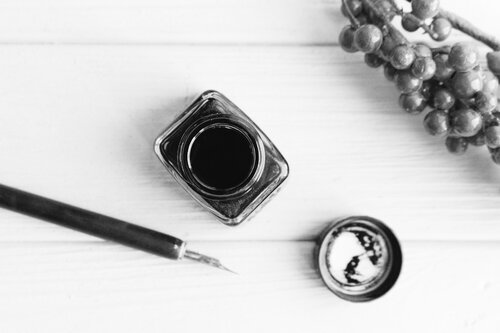
The first supplies you will need is your calligraphy dip pen of course.
As far as paper, you’re going to want to purchase 8 x 10 or larger canvas paper.
The paper needs to be of a high weight so that the ink does not bleed through the woven paper. Some required tools would be a 12-inch ruler, Standard HB pencil set, kneaded eraser, Sumi ink or Indian ink and a clean workstation with good lighting.
When doing calligraphy you don’t want to strain your eyes, so make sure you have a good amount of room light that covers your space well that isn’t too strong or weak.
To get started first pull out one of your HB pencils, and create a nice guideline with your ruler about an inch part, and lengthwise as long as your sentence for whatever you’re going to be writing. Then create a line split down the middle so that you can have a sort of mirror effect to compare each word to the accurate size desired.
Then create your sentence breaking it up into three or four chunks, depending on your style. For example you could use “life in Paris(Line break), is always beautiful(Line break), when you’re with me”.
Make sure to keep the calligraphy style / cursive style consistent, because this is what your calligraphy pen will be basing its structure on.
Keep squiggly lines nice and flowed, and don’t forget to capitalize.
Don’t keep it too tight; Keep it nice and loose to create a sense of individuality.
To add individuality to your piece, you can extend certain legs on letters such as the end making it longer than the other leg on H’s, M’s, N’s, and even Q’s.You can play around with different curves, straight edges, Curly Q’s, and you can also look up different cursive writing styles online for some inspiration. To make yours more unique, combine multiple different styles to create your own signature look.
Now when applying the pen, it has a sort of chisel tip to it, so you can’t write with it exactly how you would with a regular pen. When you’re making vertical streaks, press somewhat hard and use your shoulder motion. When making vertical chisel tips, be prepared that it will fan out and make it thicker, so know which part of the letter of you want thick and thin. This also goes for horizontal. Before doing the final piece make sure you do a test run with a few sentences or even a couple words. It’s always good to get a good feel for your calligraphy dip pen.
Don’t forget the direction that your chiseled tip is formed at. when dipping the pen into the ink, don’t dip it too much or too little. You don’t want to end up with a splattered paper or ruined sentence. Make sure to clean off your edge of your dip pen so that it doesn’t become cakey or too thick or too thin. This will make sure that your workflow is uninterrupted as much as possible.
I would keep a damp paper towel nearby and a quarter filled cup of water.
This way you can dip the paper towel in the water or your pen in the water and then wipe it off.
This is so that it doesn’t get too dry either when putting it back on the paper to start making strokes.
As soon as you’re done dipping, immediately put your pen to paper because it can dry out quickly.
If you have trouble getting ink coming out of your pen, lightly dip on the paper towel and retry it again.
Be sure to wait three to four minutes before you erasing or wiping off pencil marks. After this, to keep your newly made calligraphy art safe, keep it inside a sheet protector or even have it laminated to give it a nice smooth finish. If you can’t get it laminated, keep a piece of paper on top of your calligraphy, so that the oils from fingers won’t smudge or ruin the new ink. This will ensure a longer life span for your calligraphy art.
For the cleanup, make sure to thoroughly wipe and wash your dip pen. This will prevent any caking of ink as well as ensuring that your tip of your dip pen will work as long as possible. Keep it in a dry cool place to avoid any sort of rest from humidity. Do not keep it sitting in water. If somehow your dip pen accidentally gets caked dried ink inside of it, you can always buy ink remover at any craft store near you. You will need to let it soak for at least 10 minutes.
There many different things you can do once you learn how to use a calligraphy dip pen. You can make birthday cards, well-wishing cards, signatures and envelopes, Watermark signatures for digital media, signatures on company documents, and even wall art, and plant designs. Your imagination is the limit!